THE DESIGN-BUILD PROCESS
THE DESIGN PHASE

The goal of this phase is to create a design that accommodates your needs and your site constraints while fitting within your desired budget. There are generally two approaches we take to creating the design, either semi-custom or full custom
SEMI-CUSTOM
This process involves starting with an existing design, either one of our previous projects or a design provided by the client, then modifying the design to fit the client’s needs and site constraints. Generally, this approach will be go faster than a fully custom design and take between 2-3 months.
FULL CUSTOM
This process involves starting from scratch and designing a completely unique structure that fits your needs and wants, as well as any site constraints. Generally, this approach takes between 3-6 months depending on the complexities of the project.
At Haven, all of our design contracts are typically open-ended with no deposit or retainer required. We bill at an hourly rate for the services rendered.
There are four stages to the design process that we will work through with each client. Once the project gets started, our project team will meet bi-weekly with each client as we progress through these stages.
Design Phase 1 : Due Diligence and Feasibility Analysis
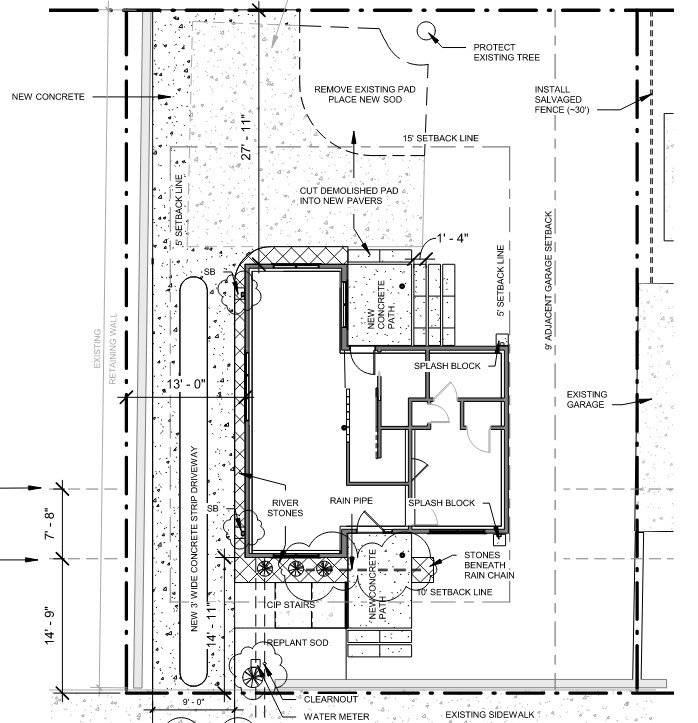
This is typically done by your project designer before the initial project kick-off meeting. It involves doing a thorough analysis of your property on the Geographic Information System (GIS) and Unified Development Ordinance (UDO) as well as reviewing any surveys or additional information you are able to provide. This allows our designers to have a comprehensive understanding of your site and all of its limitations imposed by the local jurisdiction. The primary items to review include property lot lines and dimensions, topography, setbacks, zoning, zoning overlays, stream buffers, and much more.
Design Phase 2 : Conceptual Design + Pricing
After the project kick-off meeting and doing all of our necessary due diligence, your project designer will begin to produce the first round of concept designs. This is the first stage of the project and often the most exciting as we assess all of your needs and wants and produce multiple different ideas. The goal of this stage is to hone in on one concept design that you are most satisfied with so we can put a concept estimate together. Once the concept design and estimate are finalized and approved, we will then make any final tweaks and head into finalizing the permit set.

Design Phase 3 : Final Permit Set + Pricing
During this stage, we will work with you to refine the design to answer all of the little questions about how the whole project will come together. This will include adding specific details for the space and often involves getting a structural engineer involved to make sure the framing and foundation details are sufficient. At the end of this stage, you will have a final permit set and a final estimate for us to review before heading into permitting. Once the final design and construction estimate is approved, we will submit for permits and begin the initial stages of construction implementation.

Design Phase 4 : Permitting + Specifications
Permitting can vary greatly depending on which jurisdiction you are in and the size/complexity of the project. In general, we aim for a 2-4 month permitting process. During this time we interact with the city on a regular basis, answering any questions they have about the project. We also utilize this time to work towards finalizing the specifications on the project. Specifications will include a wide variety of project details such as the type of windows, appliances, plumbing fixtures, electrical fixtures, and so on. Specifications require many decisions to be made collaboratively with the client and may extend into the early parts of the construction process.

THE CONSTRUCTION PHASE
The goal of this phase is to coordinate all of the necessary subcontractors to perform the work on time, on budget, and accurately to the design. The typical timeframe for ADUs and smaller projects is around 5-8 months and for larger custom single-family homes is 8-12 months.
During the construction phase, we have a bi-weekly meeting onsite with the clients, the project designer, site supervisor, and construction project manager. This gives us a regular time to review the work that has been done, discuss upcoming work, and answer any questions.
In order to manage the construction project efficiently and effectively, we utilize a software called CoConstruct. With this software, you will have your own independent login and be able to see all of the information pertaining to your project. This information includes schedules, budgets, actual costs, specifications, progress photos, and item-specific messaging. We hold a full onboarding to the system for our clients at the start of the construction phase.
There are typically three different contracts utilized by General Contractors for construction projects. These include: Lump Sum, Time + Material, and Cost Plus. At Haven, we almost exclusively utilize the Cost Plus contract format.
The Cost Plus contract is one that involves completely a open book relationship. This means that you see every single budget items and will see and review all quotes received throughout the project. Ultimately, you will pay only for the Cost of the project Plus a fixed builder fee that gets established at the final estimate stage before we go into permitting.
There are nine overarching stages to the construction process. These stages are everything required to go from an empty site to a completely new structure and space.
Construction Phase 1 : Construction Mobilization
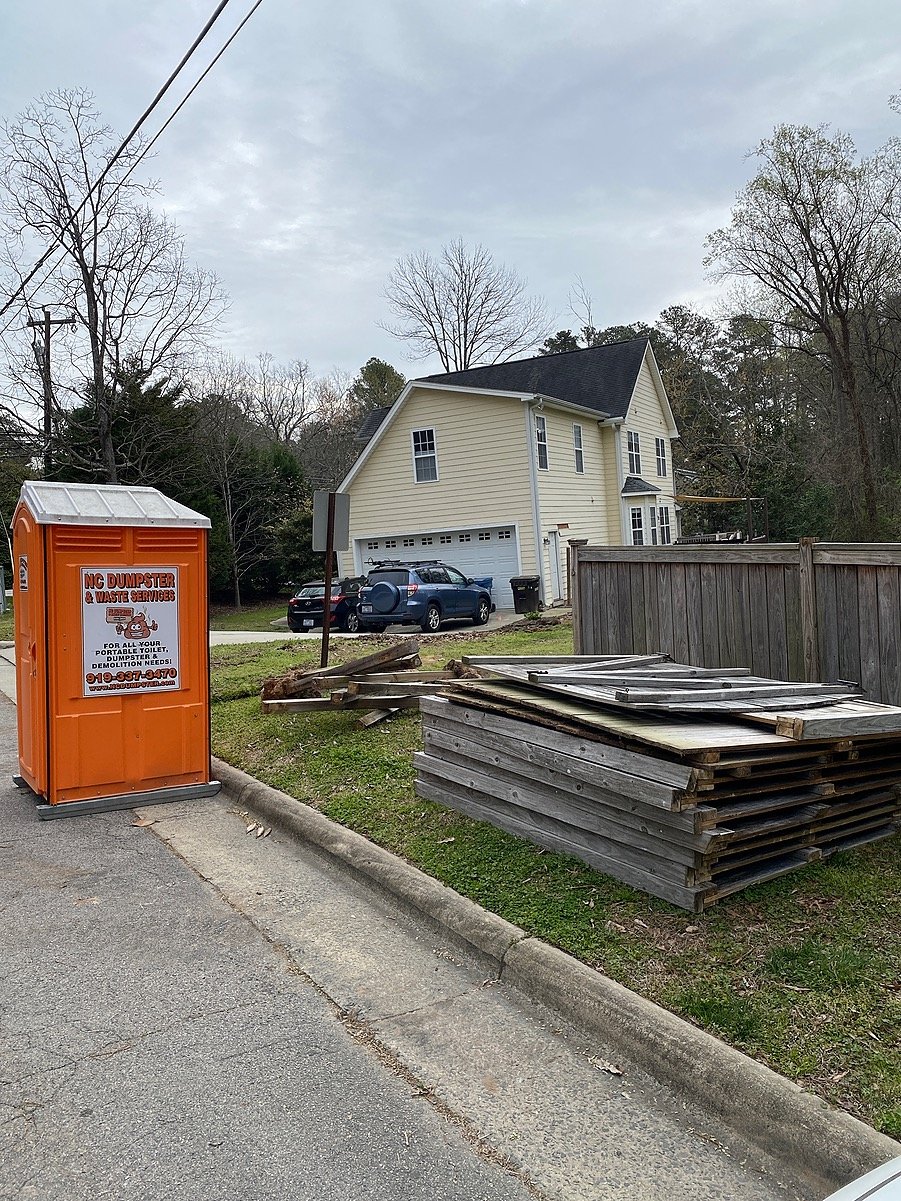
We typically expect this stage to last roughly a month between permit approval and starting on the foundation. During this time we will be working behind the scenes to finalize orders on long-lead materials, receive bids for the first few stages of the project, and get subcontractors on the schedule. We will also have our construction kick off meeting and work through site locations for the dumpster, portalet, permit box, material deliveries, etc.
Construction Phase 2 : Site Work + Foundation
During this stage, we are clearing and moving the earth to be ready for the foundation. This may involve taking down trees and moving the dirt to change the grade. We also will be digging the holes for the footers and foundations. Once the hole is dug, the city will inspect it to make sure the ground is solid. Once the concrete is poured for the footers, the foundation will be finished and we are ready for framing. It's important to note that this stage of the project has the most unknowns that often cannot be determined until we are in the middle of digging. As such, this stage is the most likely to present additional costs or schedule changes to the project.

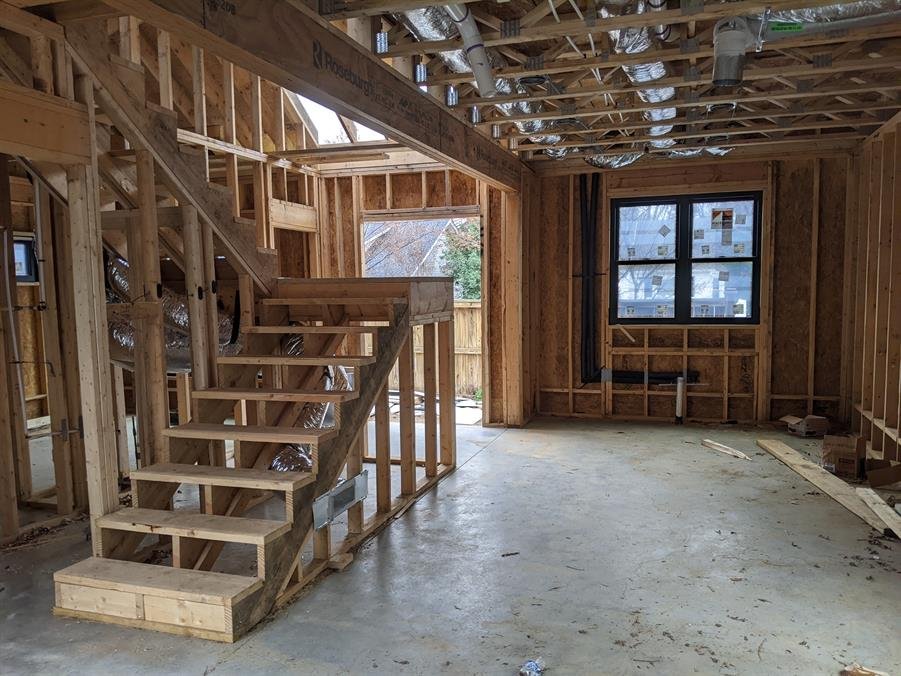
Construction Phase 3 : Framing + Dry-In
This is one of the most exciting stages of the project because the space begins to take shape. During this stage, the framer will be utilizing a lot of loud tools and put together all of the framing components. Additionally, after framing has been completed during this stage the roofing, weather barrier, windows, and exterior doors are installed to provide a dry interior environment. Once they are complete, and the Rough-In has taken place (outlined below) then the city will come and inspect the full structure to make sure it meets the code and aligns with the stated designs.
Construction Phase 4 : Systems Rough-In
The systems are the guts of the house done by the Plumber, HVAC, and Electrical technicians. Each one has its own permit and inspection process and typically takes at least a few weeks. There will be multiple meetings that we have with each technician in order to review and confirm all of the details to ensure we are setting the stage for a high quality final product. There are likely to be several small changes during rough-in to accommodate all of the complex systems, but these are typically non-significant and do not modify the final design.

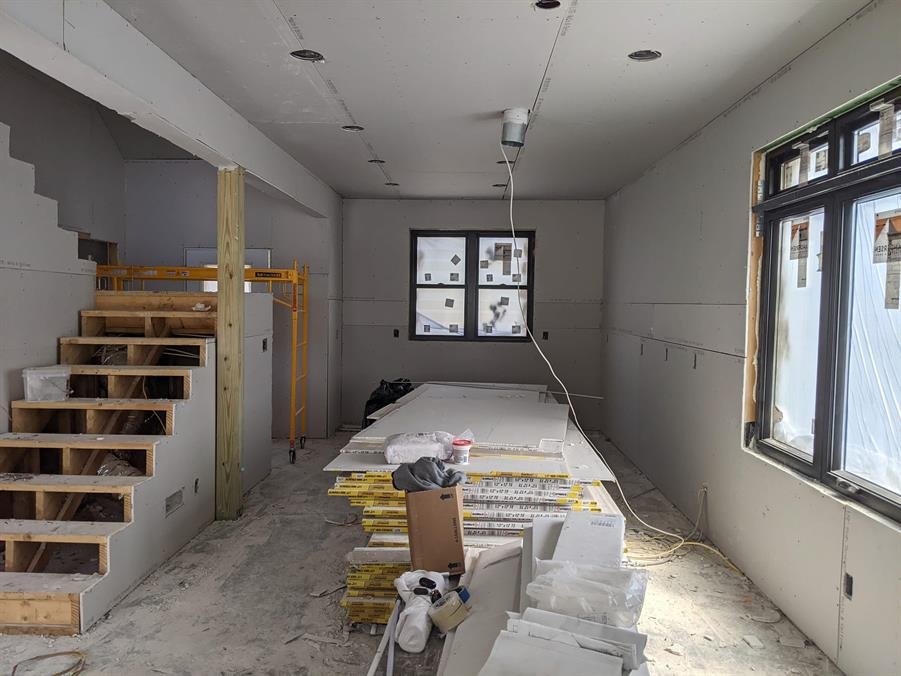
Construction Phase 5 : Insulation + Cladding
Once we have the Plumber, HVAC, Electrical, and Framing inspection approvals with the local jurisdiction, we can move onto insulation, drywall (interior cladding), and siding (exterior cladding). Insulation will also need to be inspected by the city and then cladding is installed. After the insulation inspection, we are able to do the majority of the rest of the work on the house with few additional inspections.
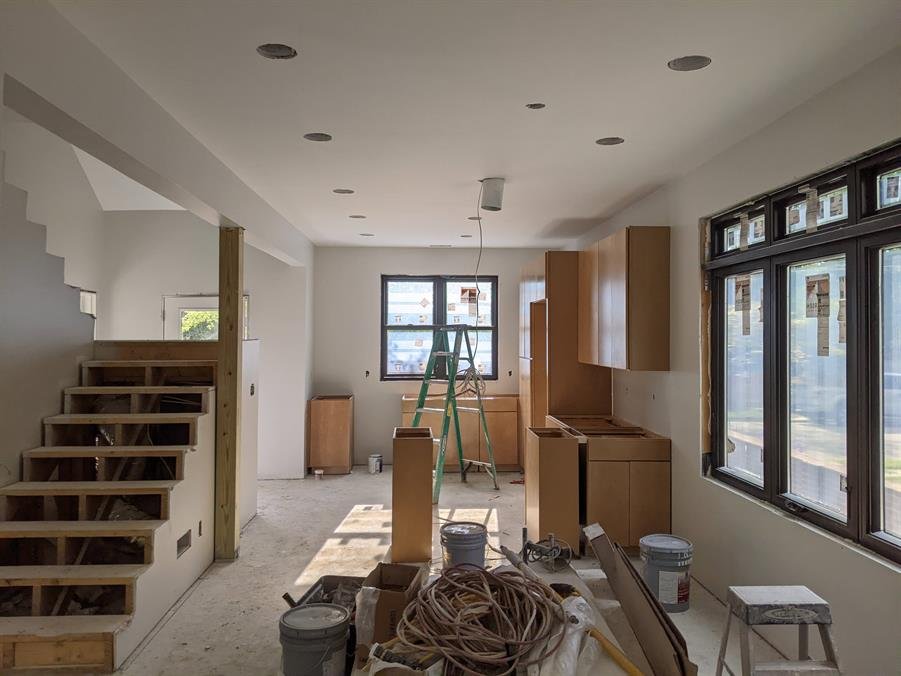
Construction Phase 6 : Finishes
This stage involves adding all of the finishing touches to the project that provide the final aesthetics and creating a functional structure. This involves paint, flooring, trim, cabinets, countertops, tiles, etc. This phase includes coordinating multiple subcontractors to do a significant amount of work and can be expected to take several weeks to several months depending on the complexity of the project.
Construction Phase 7 : Trim-Out
Once the finishes are complete, the Plumbing, HVAC, and Electrical technicians come back to add all of the final fixtures and equipment (trim-out) to the project. This often happens concurrently with some of the finish items above, but is the primary task to complete a fully functioning project. Before we can call for a Certificate of Occupancy (CO), we need each of the trades to get their own final inspection approval.

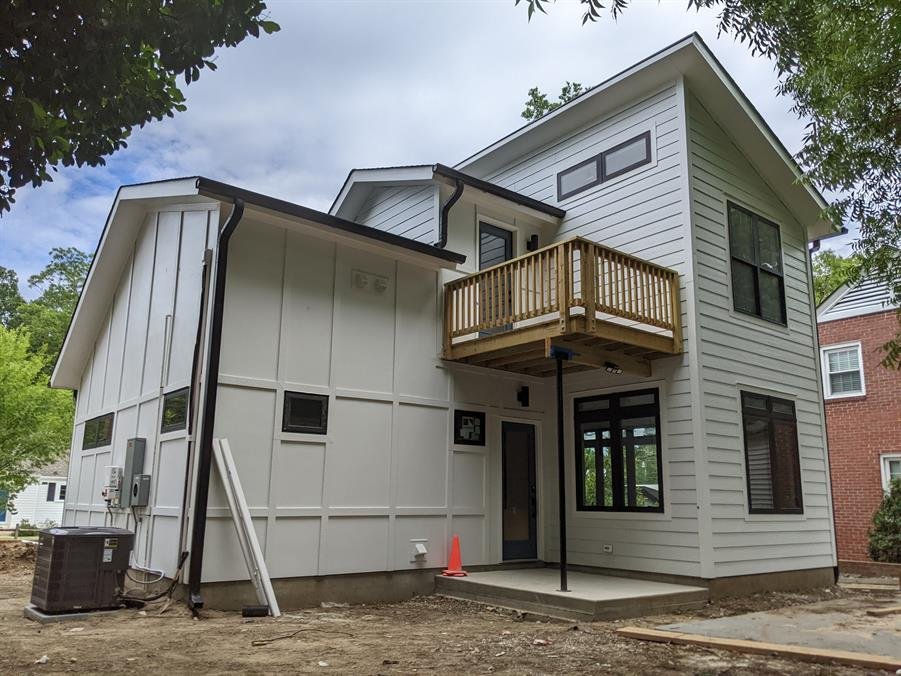
Construction Phase 8 : Certificate of Occupancy
The Certificate of Occupancy (CO) is the official certification from the city that the structure is deemed complete and habitable. Once received, you can begin to move into and utilize the space. We also will be doing a final punch list meeting with you to review the whole structure and identify any remaining items that need to be completed prior to closing out the project.
Construction Phase 9 : Final Punchlist + Warranty
The completion of the final punch list items typically lasts for the next month after receiving the Certificate of Occupancy. This is our official way of closing out the project and giving you a completely finished structure. Each project is unique during this phase, but there is almost always has some small trailing items that we will address. Once the full punchlist is completed, the project will transition into our one year warranty phase. During the first year, if there are any workmanship issues, you can reach out and we will come out and address them.
